Building My Voice Booth | Part 3- Concrete Shell and Ceiling
- Ed Povey
- Jul 4, 2022
- 5 min read

After waiting 2 days for my concrete base floor to dry, we had now finally reached the proper construction phase, time to build the new concrete block shell.
For this part we called in the professionals, Dad is in his seventies so doesn’t want to be lugging concrete blocks anymore, I haven’t got a clue, so in came some local builders, who for a fee of £800 built the shell in 1 day.
I wish it hadn’t taken 1 day, it should have taken 2 days, sadly builders in our area are in high demand at the moment and they had another job booked in, which meant my job was done far too quickly.
So my excitement of the rapid progress of my studio soon turned to sadness when I discovered the walls weren’t straight, in fact they were extremely bowed. This would prove very annoying when it came to applying my sound proofing system, the door and in fact everything else.
It turns out if you’re building a concrete block wall over 4ft, you need to let the first 4ft layer dry before building any higher. If you don’t do this, the wet mortar will flex under the weight of the blocks and you’ll end up with wonky walls, which is what happened to mine!
So, if a builder says he can build you a concrete block wall in a day and its over 4ft high, get another builder.
Despite this issue, we carried on, in hindsight I should have got the builders to demolish the shell and start again but I wanted to get the job done and was keen to move on.
After the walls had dried we now had a lovely concrete cell block.
The builders had placed 100mm of Rockwool insulation in the gap between the original walls and the shell, so we had lovely insulated concrete cell block.

Next job, tackling the ceiling…
The ceiling was frankly a mess, the old thermal insulation was hanging down from the old joists, and there were three old wasp nests up there along with an incredible amount of mouse poop, mmmm, yummy.
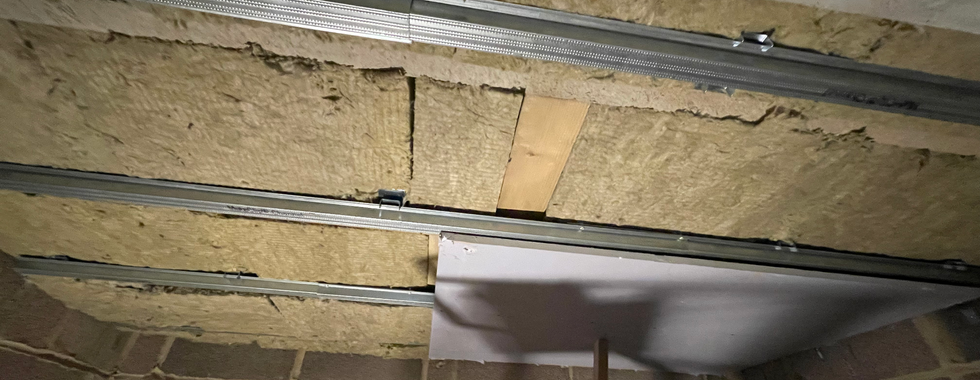
Our first task was to re-purpose the old floor joist timbers (you’ll remember those from my previous post) and cut them down to be used as our new ceiling joists. These would be laid within notches along the top of the concrete shell which we had lined with some thick rubber strip to reduce vibration transfer, we then further secured the joists with some L shaped brackets. This meant that our new ceiling joists were now only connected to the new internal concrete shell and most importantly were not connected to the outer walls of the building.
After securing all of the new joists in place, we didn’t have much room to manoeuvre, the old joists were less than 5 inches above the new ones so it was rather busy space in which to stuff our acoustic Rockwool insulation, but we soldiered on.
I highly recommend wearing goggles, a mask, some good gardening gloves and a baseball cap for this job as the Rockwool gets everywhere, it’s truly horrible stuff.
I went to town with the 100mm Rockwool as I wanted to make my ceiling as insulated as possible and I knew above the joists there was lots and lots of space.
Finally, we had come to the first proper stage of my sound proofing system from the guys at iKoustic, ‘The MuteClip LP’ system.
What’s a MuteClip?
A MuteClip is a small rectangular bracket with a flexible metal claw on its front that can snap fit to a C shaped metal channel, to which you will eventually screw your plasterboard.
The metal part of the bracket is sandwiched between two dual density rubber isolation pads, in the middle there is a hole for the fixing screw to go through. Once attached to your wall or ceiling joist these clips and channels will enable your plasterboard to ‘float’ away from your walls or ceiling, preventing sound transfer.
The MuteClip LP system is a standard MuteClip attached to a wide, low profile L shaped metal bracket. The idea being that you can attach the bracket to the side of your joists so that the Mute Clip Metal Channels which you snap into the MuteClips, end up flush with the bottom of your joists and you don’t lose out on ceiling height.
Annoyingly, having gone for this slightly more expensive system to keep my ceiling as high as possible, we discovered that due to the old ceiling joists getting in the way, we weren’t able to screw in the brackets high enough up the side of the joists to enable the system to work as it should have. This was absolutely not the fault of the system, just our particular circumstance.
Basically we ended up as low as we would have done had we just screwed the MuteClips straight into the bottom of the joists!
After attaching the MuteClips in a diamond pattern, we were ready to cut the supplied metal channels down to size and snap them into place.
If you decide to go with this system from iKoustic, we found the easiest way to cut the channels down to size was to layer them on top of each other to the length we needed and go through with a disc saw, you can cut them with a hacksaw, it just takes more time.
If you need a longer length of channel, the channels can be slotted together by overlapping them by 20mm and then fixing them with four short self tapping screws. This isn’t the easiest job, screwing self tapping screws into a piece of flexible metal, which is already suspended in a flexible clip equals a nightmare to screw in, but be patient and eventually you’ll get the hang of it.
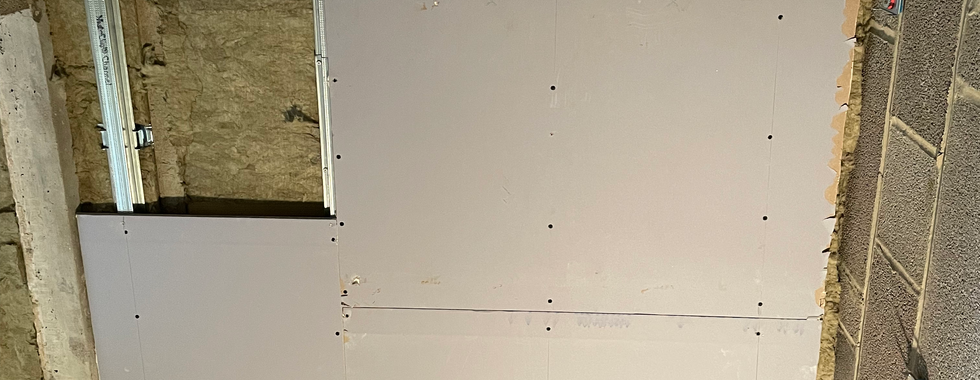
Once done, we ended up with a series of channels to screw in our first layer of acoustic plasterboard.
This was a challenging task, screwing heavy plasterboard to a ceiling is particularly tricky, one thing that made it much much better was the use of a long piece of timber as a prop, so that once the board was in place we didn’t need to hold its entire weight whilst one of us screwed it in.
After a fair bit of swearing, we completed the job.
Before the next step, we marked out where the channels were as we knew from then on we would be flying blind when screwing in the second layer of plasterboard.
The next step was the Tecsound layer, Tecsound is a flexible high mass vinyl with a self adhesive backing. It’s incredibly heavy so we needed to cut it down into manageable strips so that we could apply it to the ceiling in a semi-manageable fashion.
Cutting this stuff in a neat way, wasn’t simple, its flexible nature meant that getting a straight edge on a cut was very very tricky. We ended up doing a fair bit of patching using very thin strips where we had large gaps.
Also even when its cut into a manageable strips its still ungainly stuff to manage so this part of the job took quite some time.
We completed the sandwich by applying the final layer of plasterboard. Then it was time for a very very well earned beer.


Next time
The floor, and the walls.
See you then
Ed


Comments